
Hey trader,
A clean entry means nothing if you have no plan for the stop and the target.
That is where the money leaks out.
You get in on a good read….Then you manage on nerves.
You yank the stop on a wick…You freeze when price finally reaches your number.
This morning the ES handed me a textbook example.
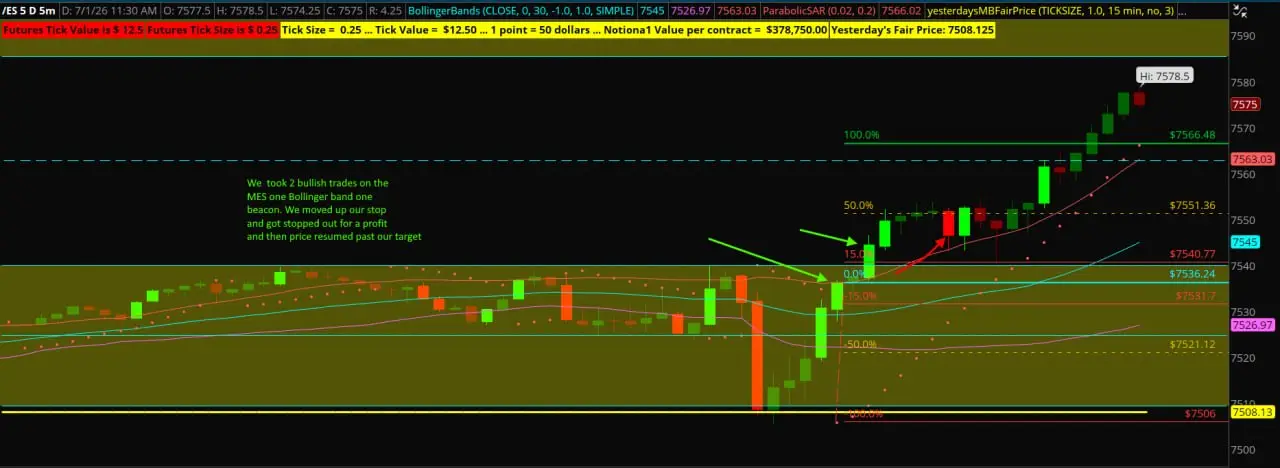
It came with one early signal, one confirmation, a stop I walked up the whole way, and a target drawn before the bell.
I am going to give you that trade step by step. Entry, stop, add, and exit, exactly as I ran it, so you can copy the sequence on your own chart.
Step 1: Draw Your Levels Before the Open
Everything starts the night before, off yesterday’s high and low.
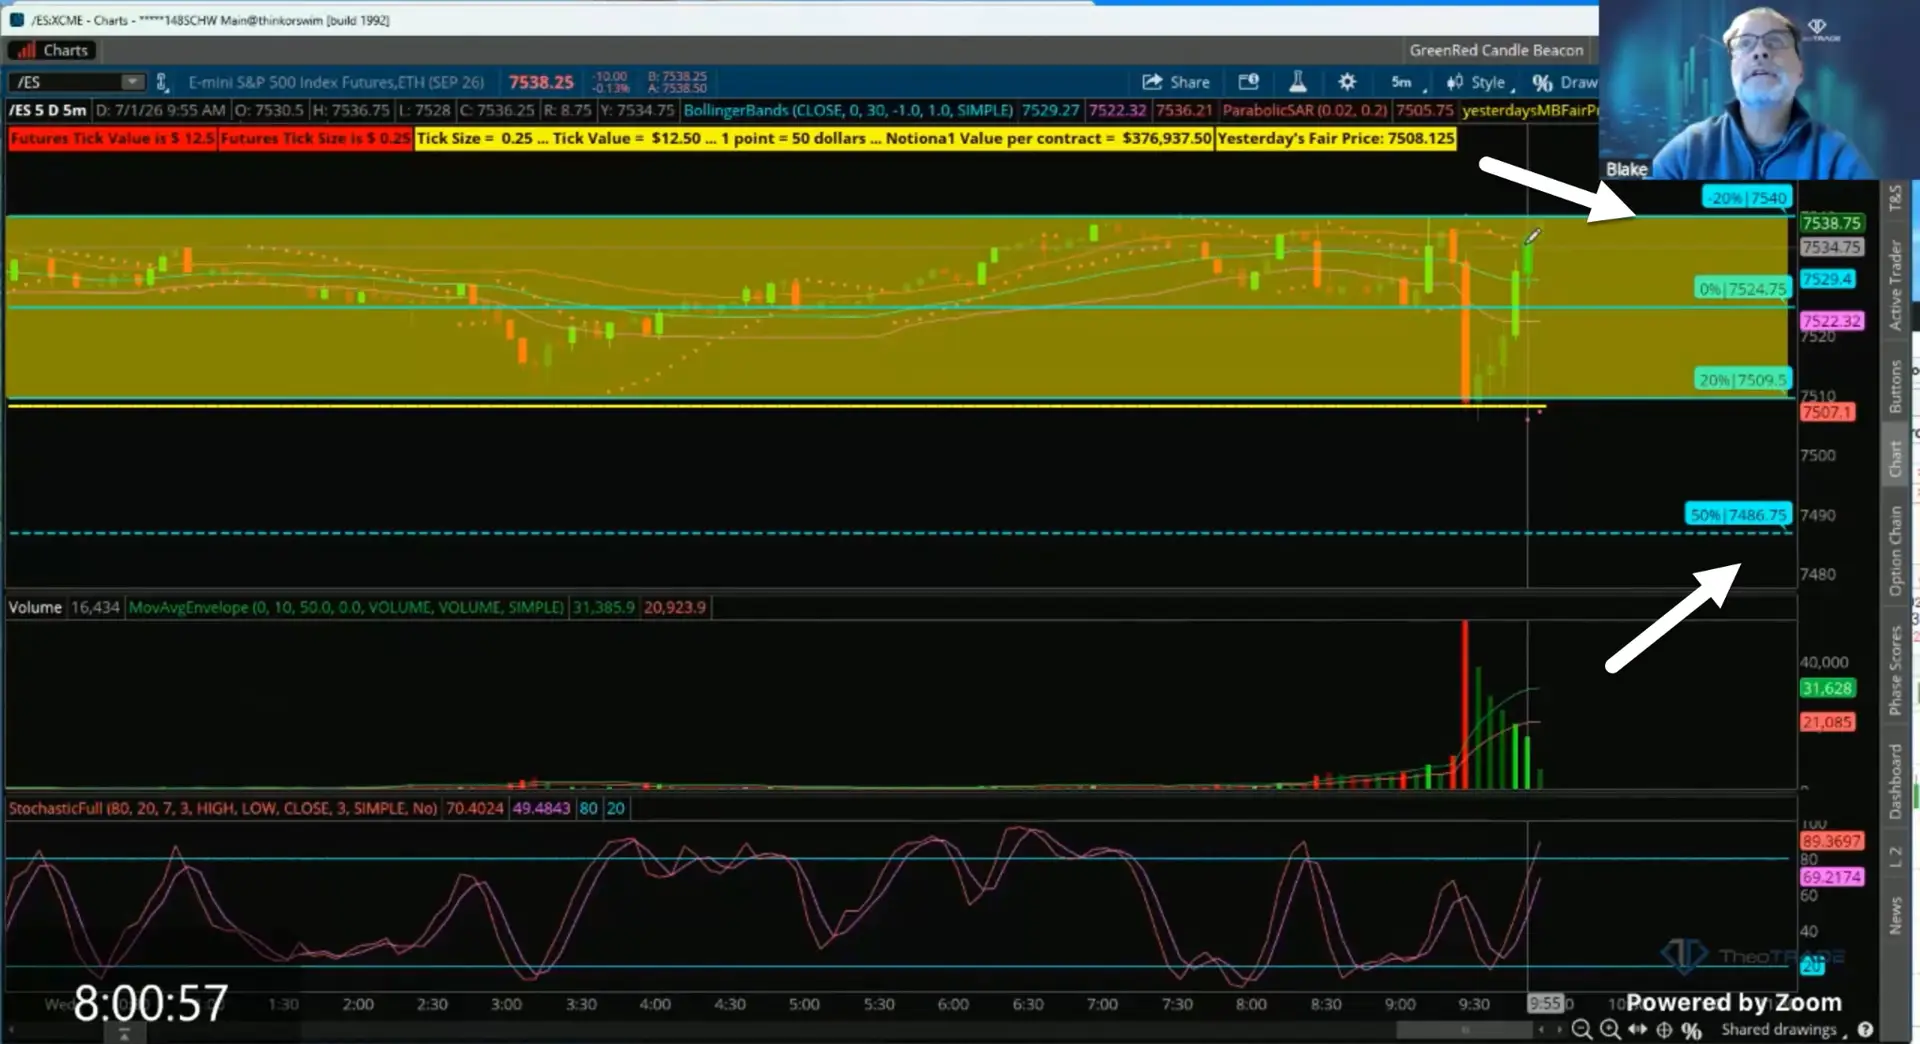
I draw a beacon. That gives me a zero line for fair price and a projected target above it. Both numbers are on the chart before a single contract goes on.
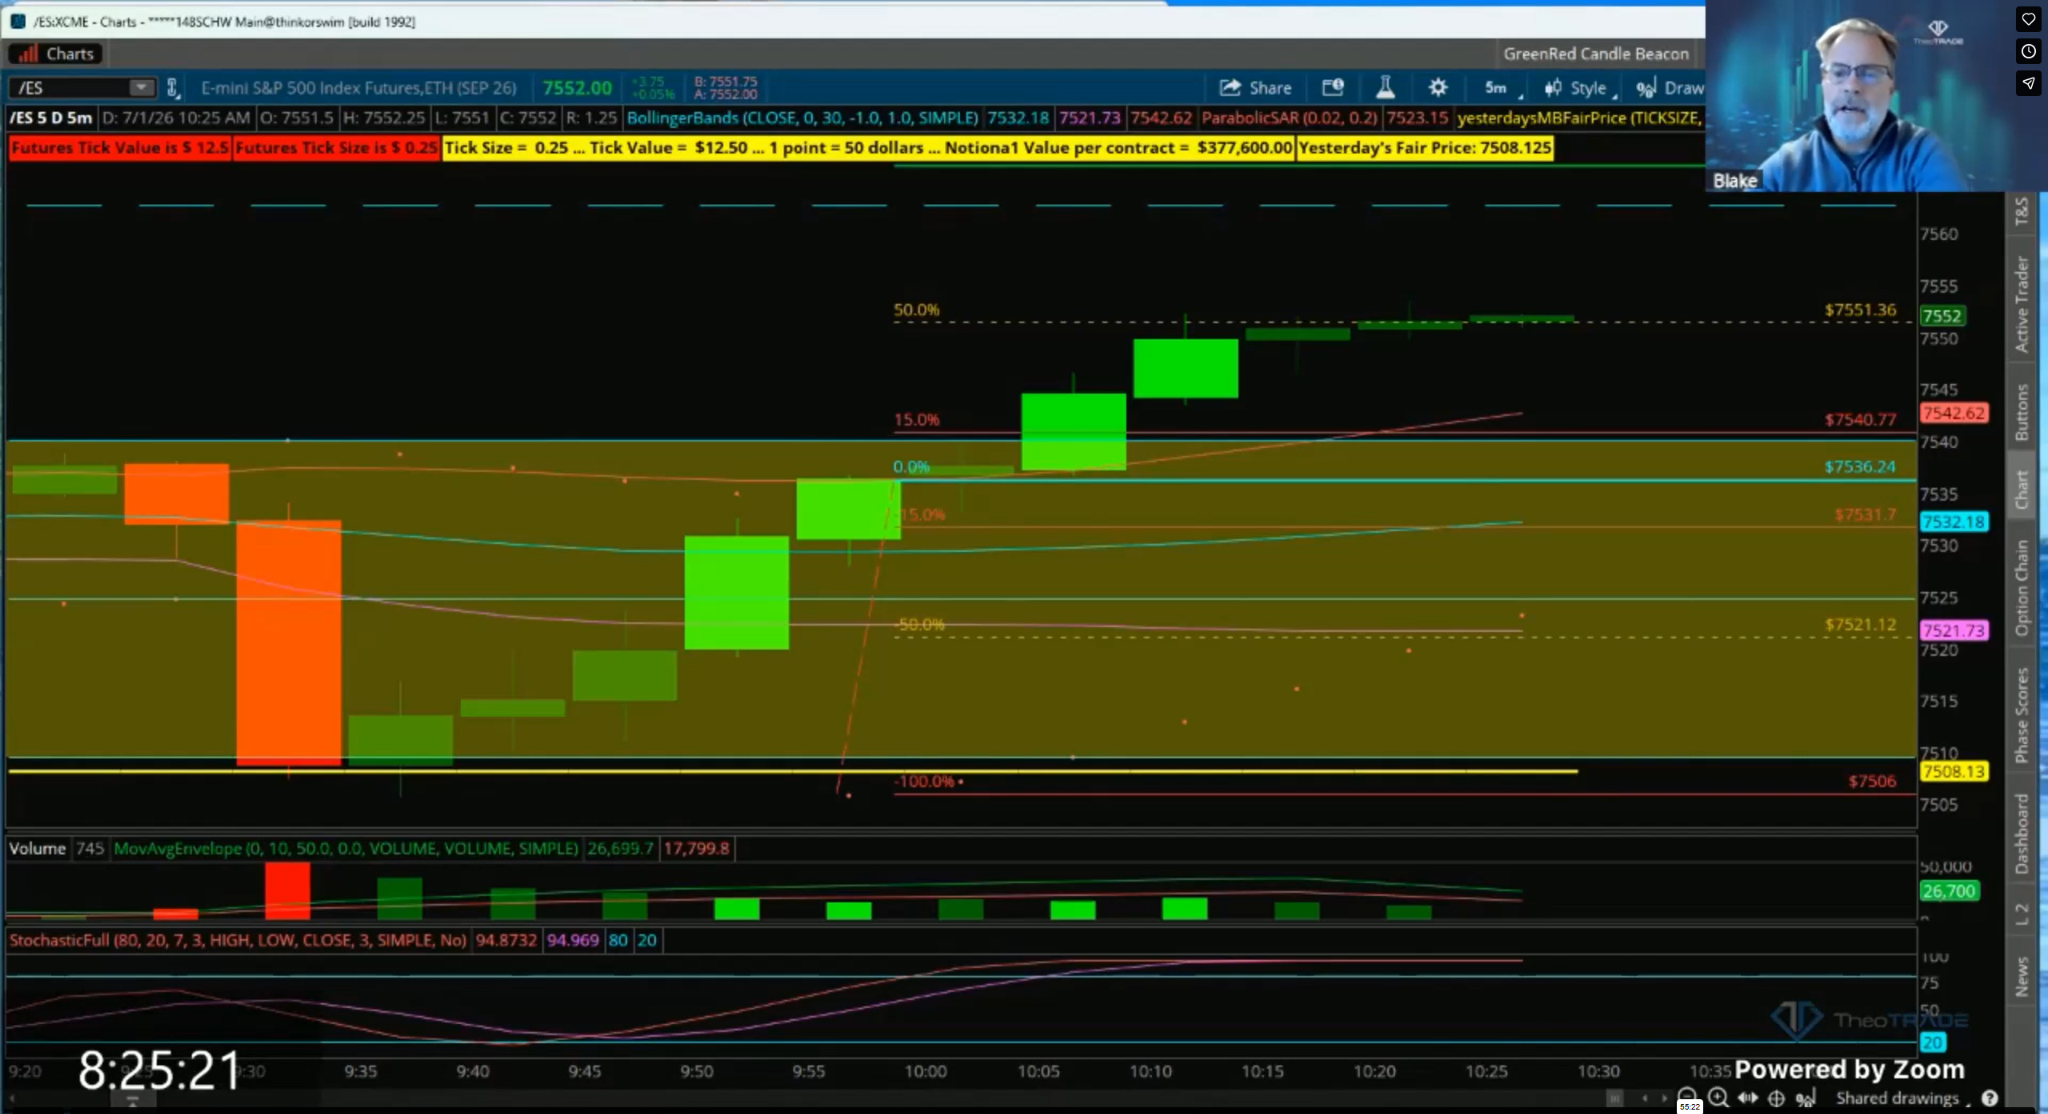
This morning yesterday’s fair price sat at 7508.125, and the upside target sat at 7566.48. That target was not a hope. It was a level I trusted before the pressure showed up.
On a perfectly balanced day the 50% target lines up with the 100% level, so the number to aim for is locked in early.
You always know where price is supposed to go.
Step 2: Wait for the Early Signal
The ES was climbing as the dollar got beat up on the Fed. That was my backdrop, not my trigger.
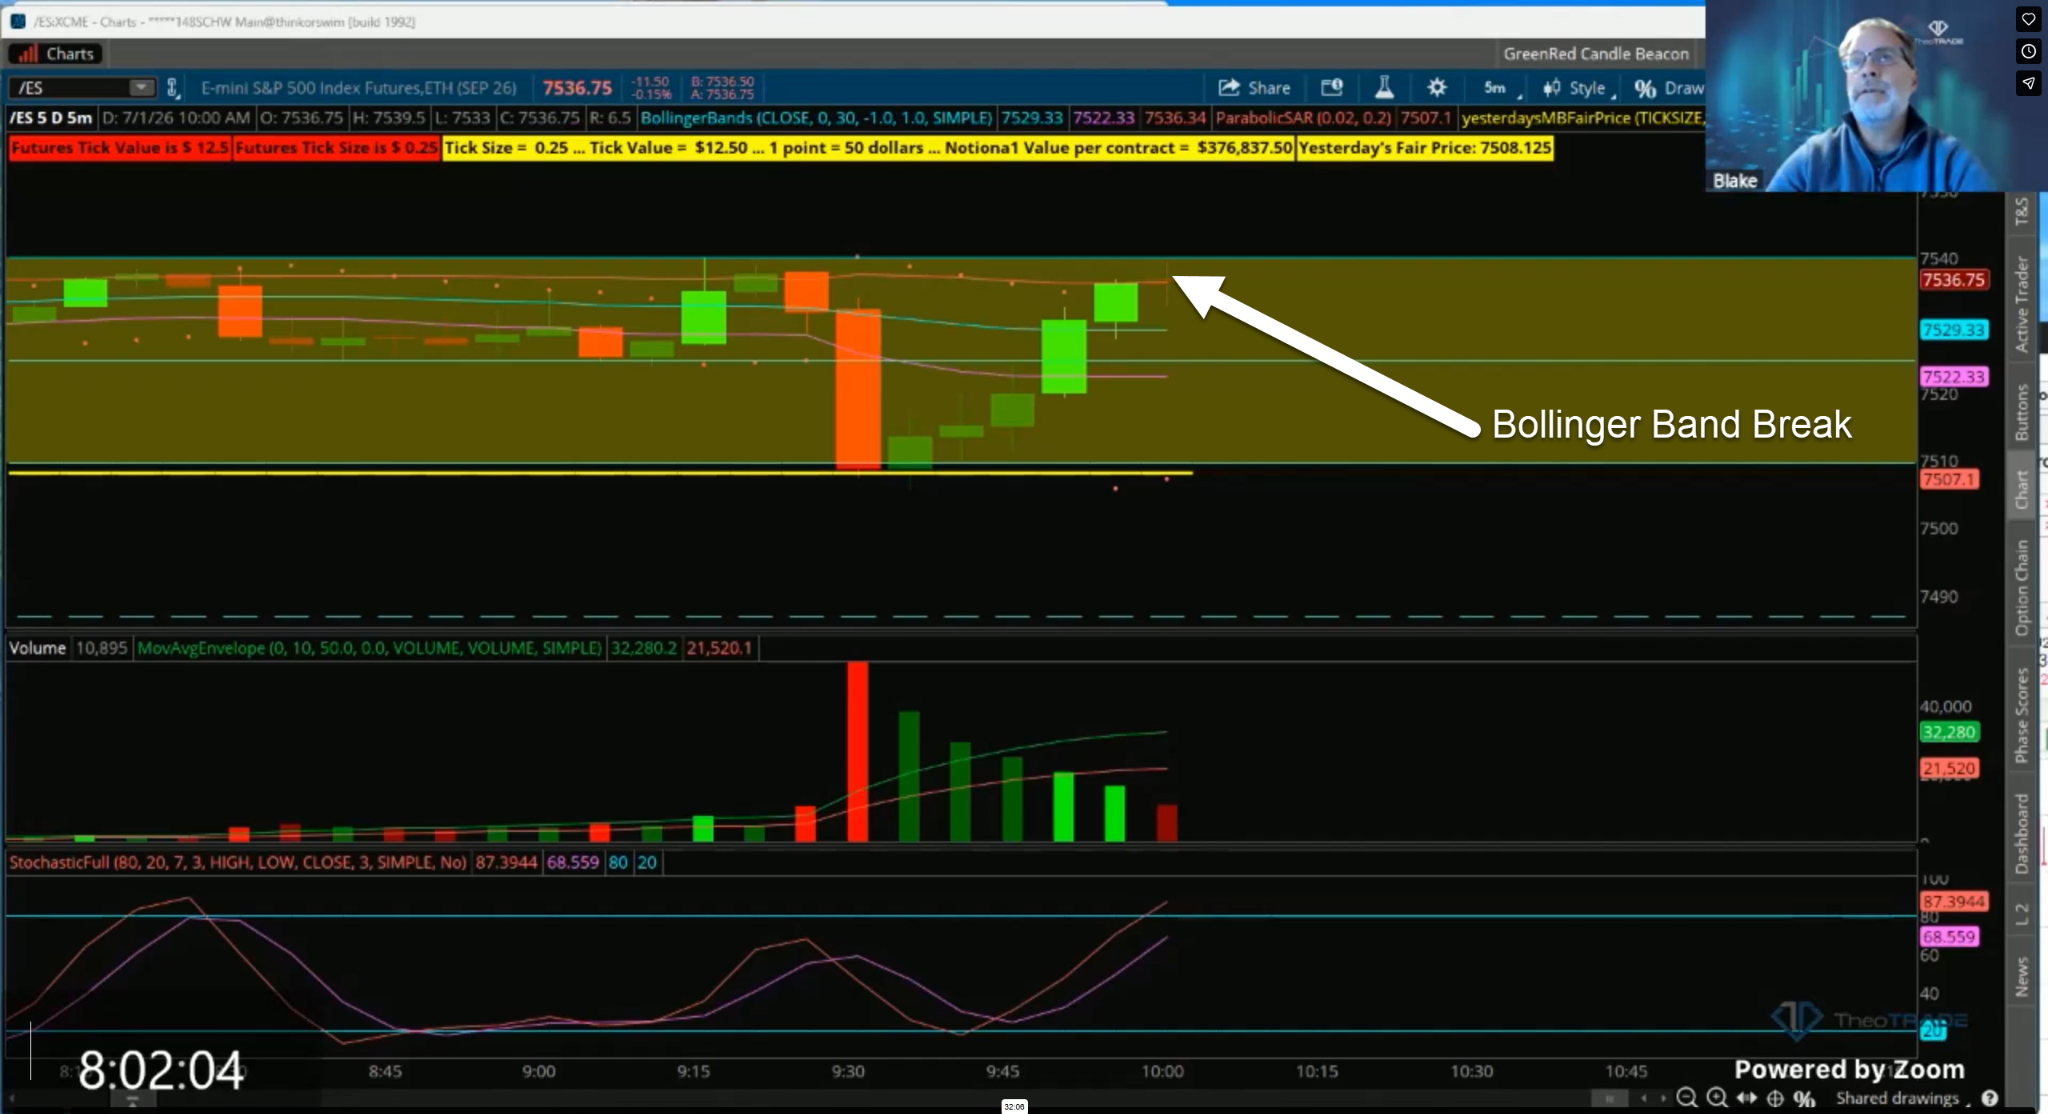
My trigger was the Bollinger Band. I use a candle that closes on or above the upper band as an early buy signal.
That upper band, one standard deviation, sat at 7536.21. Price closed at 7536.25, just above it. That close is the green light.
This gets you positioned before the beacon breakout even confirms. You enter into strength instead of chasing the move ten candles later.
Step 3: Set Your Entry and Your Stop
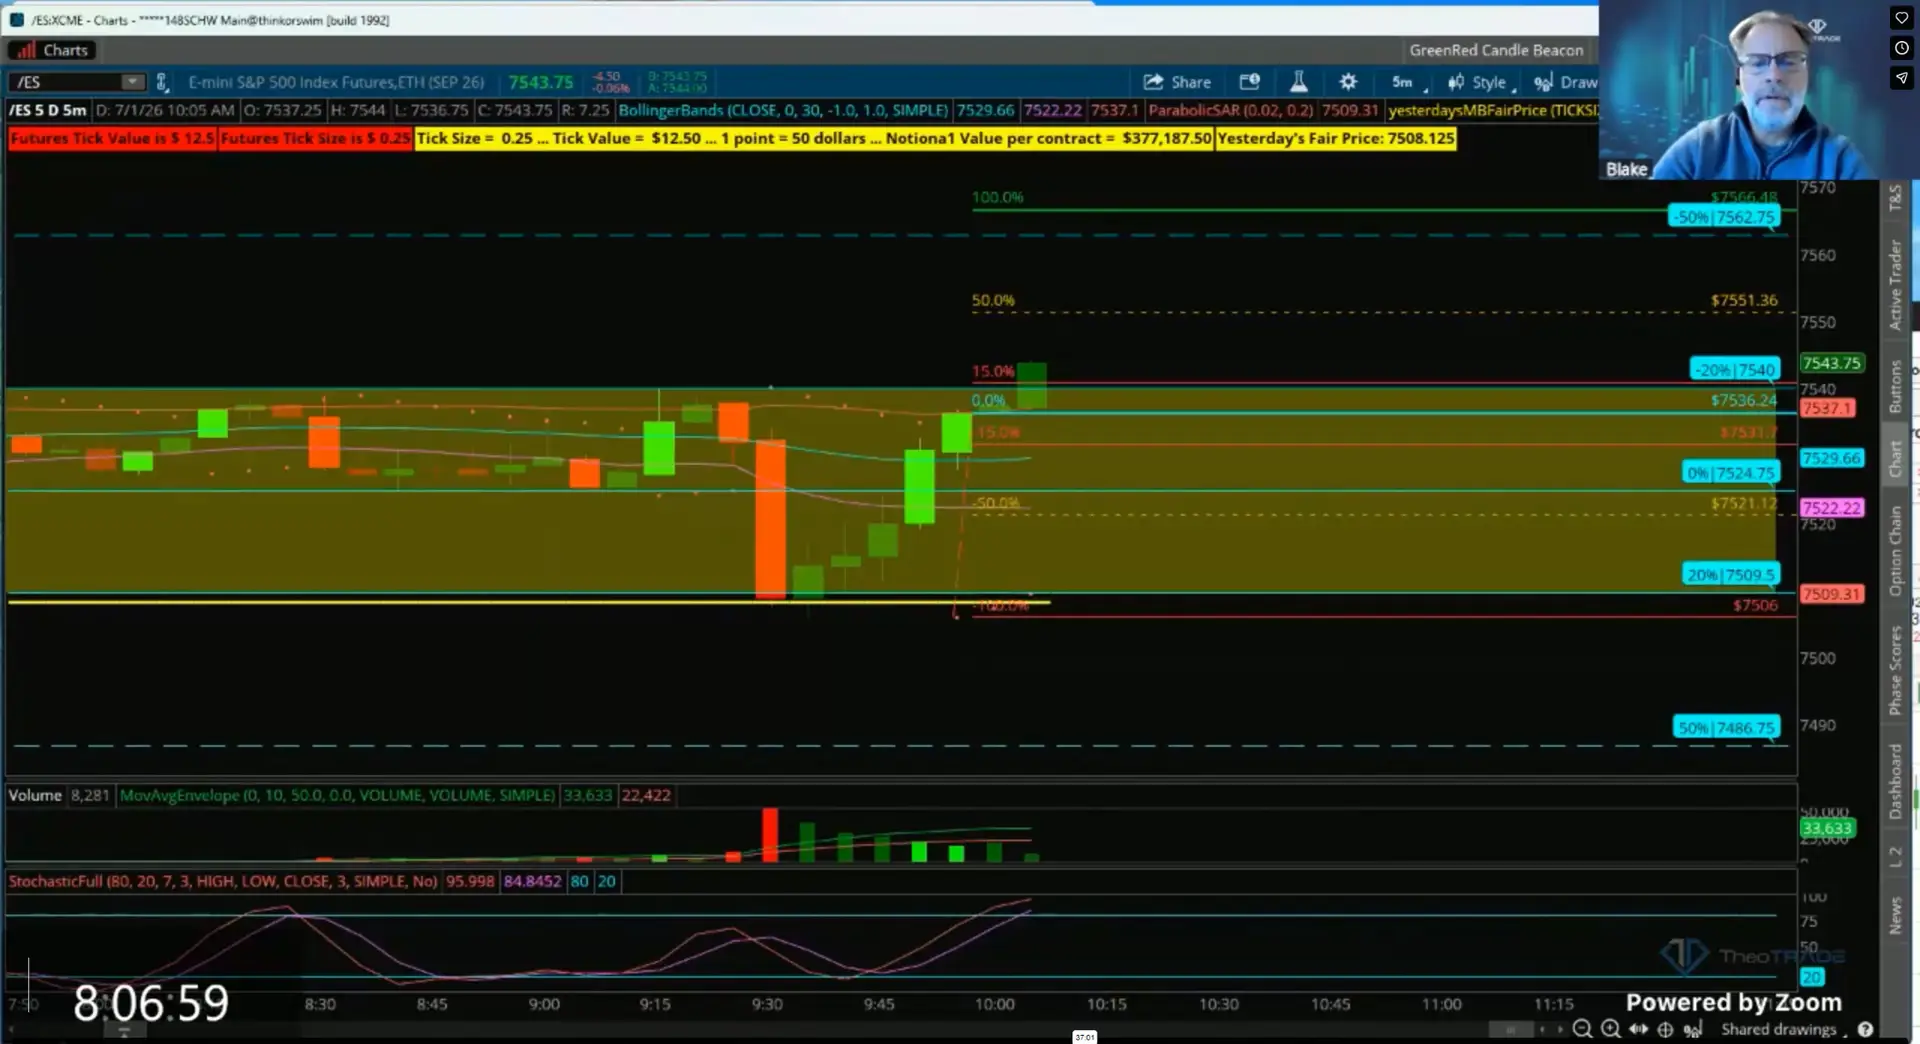
I went long at 7535 with two micros.
The stop went at 7527, one point below the reversal candle low. That is 8 points of risk, or $40 per micro.
The target was the beacon at 7566, about 30 points of room, roughly $150 per micro. I was risking 8 to make 30. That is better than one-to-one before I manage a thing.
Anchor your first stop to a real level under the candle. Do not park it at a round number that just feels safe.
Step 4: Add on Confirmation, Not on Hope
When price closed above the beacon at 7546.50, the breakout confirmed. That is when I added one micro at 7546.50.
The rule on an add is simple. The combined risk cannot break your limit.
By then I had already trailed the original stop up, so the two first micros risked only a few points together. The new micro risked about $55. The total stayed under 2 percent of the account, so the add was allowed.
If that math does not fit under your cap, you skip the add. The confirmation alone is not a reason to overexpose the account.
Step 5: Walk the Stop Up on Structure
This is the part that mattered most, and it is the same habit whether the trade wins or loses.
Price printed higher highs and higher lows. Each step up let me trail the stop behind it.
I did not move it on a wick. I moved it on closed-candle structure and one-candle reversals with follow-through. The stop stepped up through 7532, 7536, 7540, 7541, 7543, 7544.50, and finally 7546.50.
Every move shaved risk off the table while the trade stayed open. By the time the stop reached 7546.50, the whole position was locked in at profit or break even. The worst case was already removed.
One caution. I do not over-tighten. A widening candle can flick you out right before the real move, so I give the trade room to breathe while still protecting it.
Step 6: Let the Target Carry It, and Accept the Tradeoff
Price approached 7566, then stalled just short of it.
The trailed stop at 7546.50 took the whole position out for a profit. The two 7535 micros booked about 11.5 points each, roughly $57.50 per micro. The add came out flat, so it cost nothing to carry.
Then price resumed and ran all the way to 7578.5, straight past the target.
Here is the tradeoff, spelled out plainly. Trailing the stop locked the win and removed the risk. It also took me out before the last leg.
Holding for that final push risks handing back a gain you already earned. Both choices are defensible. The structure makes either one a measured decision rather than a guess.
Run This Sequence Yourself
Pull up your own chart tomorrow and walk the same six steps.
Draw the level before the bell. Take the early Bollinger Band signal. Set your entry one point past the candle and your stop one point under it. Add only when the math keeps you under your cap. Trail on closed structure, never on a wick. Let your pre-drawn target do the deciding.
Do that, and a stall near the line becomes a math question instead of a panic. You stop reacting to the candle in front of you. You start measuring it against a number you trusted before the trade began.
Click here to join us and watch the next one called in real time.
Blake Young
Senior Market Strategist, TheoTRADE